


Vantage Vue fault finder
Pick the symptom that matches what your station is doing. Each fault explains what is happening, gives you a two-minute test to do before you spend anything, and lists the parts that could be involved. Plenty of these turn out to need nothing more than a clean.
Wind
Wind cups are spinning but the console shows zeroTools needed
What is happening
If the cups are turning happily in the breeze but the console still shows 0, the cups are often not turning the shaft underneath them. This usually happens when the set screw in the hub has worked loose or the cups have ridden up the shaft.
Wind speed updates every 2.5 seconds, so it is worth watching the console for a minute or two before deciding anything is wrong.
The two-minute test
A good starting point is to refit the cups, which Davis lists as the fix for this exact symptom.
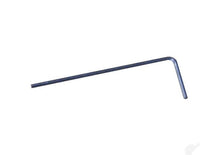
- Loosen the set screw in the hub of the cups with the Allen key and lift the cups off.
- Slide them back down the stainless steel shaft as far as they will go.
- Tighten the set screw fully, then spin the cups and press WIND on the console to check the reading.
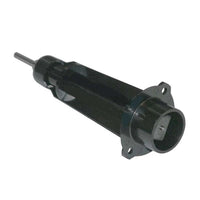
- If the shaft feels gritty or stiff when you turn it by hand, the wind speed cartridge may be worn. Davis advises not to lubricate the shaft or bearings in any way.
Parts you may need
Refitting the cups is usually all that is needed. The cartridge is only worth ordering if the shaft feels gritty or stiff.
Check before you order: Wind speed cartridge 7345.271 is for the Vantage Vue sensor suite only
Wind cups are stiff, slow or will not spinTools needed
What is happening
Wind speeds that look too low are often down to where the station is sited rather than a fault. Buildings, trees or fences can shelter the cups from the wind.
If the site is open, there may be friction stopping the cups from turning freely. Insects and debris around the hub are a common cause, and over time the bearings in the wind speed cartridge can also start to wear.
The two-minute test
It is worth checking the site first, then the cups themselves.
- Davis suggests mounting the cups at least 2.1 m (7 ft) above the ground, clear of anything that blocks the wind.
- Loosen the set screw, remove the cups and clear out any insects or debris around the shaft.
- Turn the shaft slowly by hand. It should feel smooth.
- If it feels gritty or stiff, the wind speed cartridge is the likely cause. Do not lubricate the shaft or bearings.
Parts you may need
Clearing debris and checking the site costs nothing. A new cartridge is only needed if the shaft still feels gritty or stiff once it is clean.
Check before you order: Wind speed cartridge 7345.271 is for the Vantage Vue sensor suite only
Wind direction is wrong or offsetEasy - no tools
What is happening
The Vue wind vane is calibrated at the factory to read correctly when the solar panel faces south. If your sensor suite is mounted facing another way, every direction reading will be offset by the same amount. This is one of the most common wind queries and usually needs no parts at all.
In the Southern Hemisphere, or anywhere the panel cannot face south, Davis says the console must be calibrated.
Less often, a vane that has come loose on its shaft can slip and give readings that drift.
The two-minute test
- Check which way the solar panel faces. If it is not south, calibrate the wind direction on the console using the steps in the console manual.
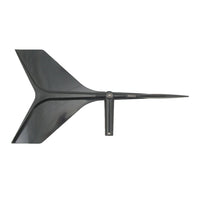
- To check the vane, point it directly away from the sensor suite. The console should show south. Turn it 180 degrees and it should show north.
- Allow about 5 seconds for the display to settle after each move.
- If the vane moves on its shaft, tighten the vane set screw firmly with the Allen key.
Parts you may need
Usually no parts at all, as this is normally a console calibration. A new vane is only needed if yours is cracked or broken.
Check before you order: Vane 7345-297 is for the Vantage Vue sensor suite only
Wind cups or vane are cracked or brokenTools needed
What is happening
The cups and vane sit high on the sensor suite, so they can occasionally be damaged by birds, hail, falling branches or knocks during maintenance. A cracked or missing cup can make wind speed read low or unevenly.
The two-minute test
- Look closely at each cup and at the vane for cracks, chips or missing pieces.
- Spin the cups and watch them turn. They should run smoothly without wobbling.
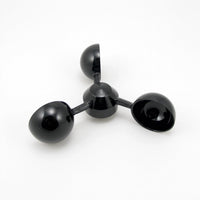
- To fit new cups, slide them down the shaft as far as they will go and tighten the set screw fully with the Allen key.
- To fit a new vane, slide it onto its shaft, rotating it slightly, then tighten the vane set screw firmly.
Parts you may need
Check before you order: Cups 7342-178 and vane 7345-297 are Vantage Vue parts
Rain
No rainfall is recorded at allFree fix - cleaning only
What is happening
When no rain is recorded, the most common cause is a rain funnel that is clogged with debris, so the water never reaches the tipping spoon.
Leaves, spider webs and dirt can collect in the debris screen and around the tipping spoon over time. Davis recommends cleaning the rain collector and debris screen at least once a year.
The two-minute test
A good starting point is a simple water test, which Davis uses to confirm the rain display is working.
- Select RAIN DAY on the console.
- Slowly pour about half a cup of water into the rain collector and wait two seconds to see if a reading appears.
- If nothing registers, clean the rain collector and debris screen with a damp, soft cloth, and use pipe cleaners for anything stuck in the screen.
- Undo the thumbscrew, slide out the tipping spoon assembly and gently clean it without scratching the spoon.
- Cleaning can cause false rain readings, so clear the test data from the console afterwards.
This test confirms the display is working. It does not check accuracy.
Watch the official Davis video

Parts you may need
Cleaning is usually the whole fix. The rain mechanism is only worth ordering if the tipping spoon is damaged or still will not register after a thorough clean.
Check before you order: Rain mechanism 7345-319 is the Vantage Vue 0.2 mm metric version
Rain totals seem too lowFree fix - cleaning only
What is happening
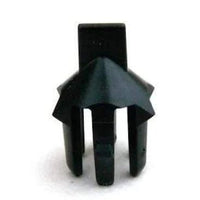
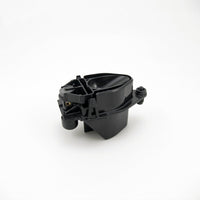
Davis lists under-reading as the most common rain collector problem on the Vue. It is usually caused by debris partly blocking the debris screen or the tipping spoon, so some of the water never gets counted.
If the collector is clean and the readings are still consistently low, the console lets you apply a small percentage correction.
The two-minute test
- Clean the debris screen and tipping spoon module, as described in the sensor suite manual.
- Check the sensor suite is mounted as level as possible, using the bubble level on top.
- Make sure it is not under trees or close to a building, where the rain can be sheltered.
- If you have measured a consistent error, you can enter a Rain Error in Percent on setup screen 13. The range is -25 to 25 percent, and it only affects future rain data.
Watch the official Davis video
Parts you may need
Usually no parts at all. A new debris screen is only needed if yours is damaged or missing.
Rain readings are out by a set amountFree fix - cleaning only
What is happening
The Vue tipping spoon is calibrated at the factory to measure either 0.01 inch or 0.2 mm per tip, depending on the model. A total that is out by a steady amount can sometimes be down to the wrong mechanism for the console setting, or a units choice that has been changed.
Setup screen 13 is used at the factory for this calibration. It does not change the units on your display, and most people will not need to touch it.
The two-minute test
- Check which rain mechanism is fitted. The metric version is part number 7345.319 and measures 0.2 mm per tip.
- To change the display units between inches and mm, use Selecting Units of Measure in the console manual rather than screen 13.
- If you still see a steady error after that, the Rain Error in Percent setting can correct it.
Parts you may need
No parts needed in most cases, as this is normally a console setting.
Check before you order: Rain mechanism 7345-319 is the Vantage Vue 0.2 mm metric version
Temperature & humidity
Outside temperature or humidity looks wrongTools needed
What is happening
Readings that look too high or too low are often down to the radiation shield or the site rather than a failed sensor. A build-up of dirt, debris or insect nests inside the shield reduces its effectiveness and can cause inaccurate temperature and humidity readings.
Temperatures that read high can also come from nearby radiant heat sources, and readings that are too low can be caused by sprinklers hitting the shield.
Davis also points out that comparing your readings with TV, radio or a neighbour is not a reliable check, as readings can vary a lot over short distances.
The two-minute test
A good starting point is the radiation shield, which Davis suggests checking at least once a year.
- Use a Phillips screwdriver to loosen the two screws holding the five shield plates together.
- Keep the plates in order, separate them and remove any debris from inside.
- Reassemble the plates in the same order, with the solid plates and drain holes towards the mounting pole.
- Clean the outer edge of each ring with a damp cloth. Do not spray the shield or use lots of water, as this can damage the sensors.
- If the readings are close but consistently out, you can enter a calibration offset of up to 12.7 degrees on the console.
Watch the official Davis video
Parts you may need
Cleaning the shield and checking the site are usually enough. The harness assembly carries the sensor electronics and is a larger job, so it is worth speaking to us before ordering one.
Check before you order: Harness assembly 7345.917 is for the Vantage Vue sensor suite only
Reception
Console shows dashes or no outside dataEasy - no tools
What is happening
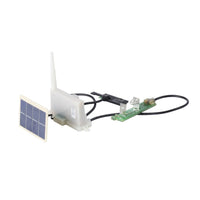
Dashes in place of outside readings usually mean the console has stopped hearing the sensor suite. After 10 minutes with no data, the console dashes out any missing readings.
The most common causes are a flat or badly fitted sensor suite battery, the console being left in Setup Mode, or the transmitter ID being changed at one end but not the other. Interference from a neighbour's weather station can also cause problems in some cases.
The two-minute test
It is worth checking the sensor suite end first.
- Make sure the battery is fitted properly, then press and release the white transmitter ID button next to the battery compartment once.
- The green LED should blink once for ID 1. It then flashes every 2.5 seconds while it transmits.
- On the console, check for the antenna icon below the compass rose. If it is missing, press 2ND then SETUP, then DONE, to make the console look for the signal again.
- Check the transmitter ID matches on both the sensor suite and the console.
- Keep the two at least 3 m (10 ft) apart. The maximum range is 300 m (1000 ft) line of sight, and metal obstructions can shorten it.
- If the LED does not light at all, see the fault for a sensor suite with no power.
Parts you may need
No parts needed in most cases.
Power & battery
Console shows a low battery warning for the stationEasy - no tools
What is happening
The Vue sensor suite runs on solar power, with a CR-123A 3-volt lithium battery backing up the capacitor. When that battery runs low, the console shows a low battery message for the transmitter.
Battery life is 8 months without sunlight and can be more than 2 years, depending on how much solar charging the station gets. Stations in shady spots, or through a dark winter, tend to need a new battery sooner.
The two-minute test
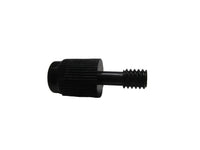
- Undo the thumbscrew on the battery compartment cover and fit a new CR-123A battery, with the + sign matching the marking inside the compartment.
- Refit the cover and tighten the thumbscrew.
- Press the white transmitter ID button once and check the green LED blinks.
- Do not worry if the warning stays on. Davis explains it does not reset until midnight, and it can occasionally take 2 to 3 days to clear, which is normal as long as outside data is being received.
Parts you may need
We do not currently stock the CR-123A battery on its own. The tune up kit includes a lithium battery, and the thumbscrew is available if yours is lost or damaged.
Sensor suite LED does not light, or it stopped after a stormEasy - no tools
What is happening
If the green LED does not light when you press the white button, the sensor suite is not powering up. The white button is not a reset button, but it is a quick way to tell whether the station has power.
Occasionally this follows a lightning storm. Davis has a simple reset that often brings a station back, although in some cases lightning damage cannot be repaired.
The two-minute test
It is worth trying a fresh battery first, then Davis's reset.
- Check for any visible damage and take photos if you see any.
- Remove the battery.
- Cover the solar panel so no light can reach it, for example by wrapping it in a blanket or leaving it in a cupboard.
- Leave it in the dark for 24 hours.
- Refit the battery, press the white button and check for a normal blink from the LED.
- If the LED still does not light, the sensor suite transmitter may have a fault. Get in touch and we can help with the next step.
Parts you may need
Try the reset first, as it often solves the problem without any parts. If the LED still does not light, get in touch and we can help with the next step.
Display & console
Console display is blank, frozen or sluggishEasy - no tools
What is happening
A blank display usually means the console is not getting power, either from the mains adapter or the batteries.
A display that locks up can often be cleared with a reset. If it happens frequently on mains power, a power surge may be the cause.
The console and display may not work properly below 0°C, so a sluggish console in a cold spot is not necessarily a fault.
The two-minute test
- Check the power adapter connections, and replace the three C-cell batteries if the console shows a low console battery message.
- To reset a frozen console, remove the mains power and the batteries, then restore power.
- If it keeps locking up on mains power, try plugging the adapter into a surge suppressor, or run it on batteries, which last up to a year.
- In cold locations, move the console indoors.
Parts you may need
No parts needed in most cases.
Servicing
Station is a few years old and due a serviceTools needed
What is happening
A yearly clean keeps a Vue reading accurately and heads off most of the faults on this page. Davis recommends checking the radiation shield and cleaning the rain collector and debris screen at least once a year.
On older stations, the wind speed cartridge, rain mechanism and battery can all wear or run down over time.
The two-minute test
- Clean the rain collector, debris screen and tipping spoon, then the radiation shield, following the sensor suite manual or the Davis video.
- Turn the wind cup shaft by hand to check it is smooth.
- Clear any data recorded during cleaning from the console afterwards.
- If the station is a few years old, a tune up kit replaces the parts that wear in one go.
Watch the official Davis video
Parts you may need
The tune up kit includes a metric rain mechanism, debris screen, wind speed cartridge, lithium battery and Allen key.
Check before you order: Tune up kit 6996M is the metric version for the Vantage Vue