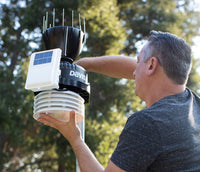
Vantage Pro2 fault finder
Pick the symptom that matches what your station is doing. Each fault explains what is happening, gives you a two-minute test to do before you spend anything, and lists the parts that could be involved. Plenty of these turn out to need nothing more than a clean.
Wind
Wind speed reads zero, but direction still worksTools needed
What is happening
If the wind speed sits at zero while the direction still reads normally, the fault is usually on the speed side of the anemometer. Speed and direction come from two separate sensors, so it is quite common for one to fail while the other carries on as normal.
Wind readings only refresh every 2.5 seconds, so it is worth watching the console for two or three minutes before you decide anything is wrong.
Worn bearings are the most common cause, and they tend to show up on stations that are more than a few years old.
The two-minute test
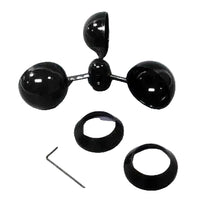
On a calm day, turn the wind cups slowly with one finger. Healthy bearings make it hard to keep your finger in contact, and the cups bounce away easily.
- Dragging, a gravelly feel, sticking spots, or cups that spin then stop and restart a second later usually point to worn bearings.
- Give them a hard spin and watch from the side. A wobble often means a bent shaft.
- It is worth trying the free checks first. Look for spider webs around the cups, ice in cold weather, and on pre-2013 anemometers cups that have slipped down the shaft. If they have, loosen them, push them firmly up the shaft and retighten.
- On an older anemometer, if a sharp tap on the body above the cups briefly brings the reading back, the internal speed switch may be failing and the head will normally need replacing.
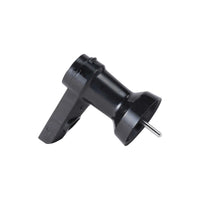
Parts you may need
Check before you order: Bearing cartridge fits hour-glass anemometer bodies made from spring 2013 onwards only
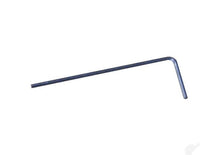
Wind speed and direction have both goneTools needed
What is happening
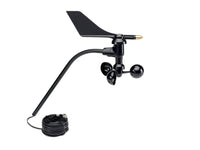
When speed and direction disappear at the same time, it is usually the shared path between the anemometer and the transmitter that has broken, rather than both sensors failing together.
The most common causes are a cut, nicked or badly jointed anemometer cable, or a poor connection where the cable plugs into the transmitter board.
The two-minute test
A good starting point is the cable itself, since that is where most of these faults turn out to be.
- Walk the full cable run, looking closely at any joint or extension.
- Open the transmitter shelter, unplug the anemometer connector and check the pins and socket for grit or moisture.
- Reseat the plug until it clicks positively home.
- Bend the cable gently where it enters the plug and look for a loose conductor.
Parts you may need
Wind direction stuck, wandering, or pinned to northTools needed
What is happening
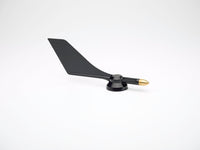
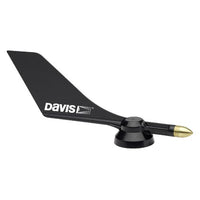
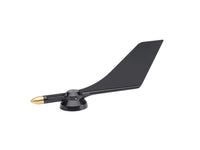
Direction that sticks, wanders or sits on one heading is often down to the vane. A vane that is loose, split or binding on its spindle can stick or drift about.
If the direction sits permanently on north, or flicks to north now and then, that usually points to damage to the direction wire in the cable rather than a problem with the vane.
If the vane is sound and the cable is good, the direction sensor inside the anemometer may have failed. Unfortunately that part is not economically repairable.
The two-minute test
- Rotate the vane through a full 360 degrees. It should turn freely, with no grittiness or resistance.
- Check that the spindle is not bent.
- If the anemometer arm is not pointing at true north, every reading will be offset. Davis publishes a console procedure that corrects this without any new parts.
Parts you may need
Check before you order: Check whether your vane shaft is D-shaped or round before ordering - the vanes are not interchangeable
Wind speed spikes to impossible valuesFree fix - cleaning only
What is happening
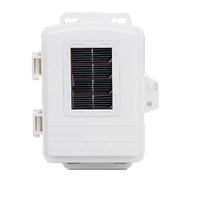
Wind speeds that jump to impossible figures are nearly always caused by moisture in the wind socket on the transmitter board. The damp reads as extra contact closures, which the console then interprets as a very high wind speed.
The moisture usually gets in through a cover that is not sitting squarely or fully latched, a twisted cover, or a foam plug in the rear cable port that has perished with age.
The two-minute test
- On a dry day, slide off the compartment cover and unplug the wind cable.
- Look for water droplets, dab them dry with tissue and leave the plug out for a few hours.
- Then sort out how the water got in. Check that the cover seats squarely and latches fully, and that the foam plug in the rear cable port is still in place and has not perished.
Parts you may need
Drying the socket is usually the whole fix. You would only need a new cover if yours is cracked, warped or will not latch squarely.
Rain
No rainfall recorded, even in heavy rainTools needed
What is happening
When nothing is recorded at all, it usually comes down to one of three things. Either the water is not reaching the mechanism, or the mechanism cannot tip, or the tips are not being detected.
Detection is handled by a reed switch under the mechanism, and these can fail with age.
Davis recommends cleaning the rain collector a few times a year, which keeps readings accurate and heads off most of these problems.
The two-minute test
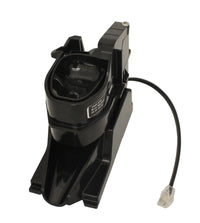
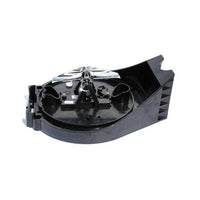
The manual tip test will usually tell you which part is at fault. Take the funnel off, tip the mechanism slowly by hand with a few seconds between tips, and listen for a faint click as it passes the midpoint.
- Five tips on a 0.2 mm metric gauge should show 1 mm on the console within 30 to 60 seconds.
- Do it on a dry day so the daily total starts at zero, then clear the test total using your console manual.
- It is worth trying the free checks first. Make sure the central hole in the funnel is clear, the debris screen is in place, and the funnel is seated in its groove, locked and level.
- Give the mechanism a clean. A single spider web is enough to stop it tipping.
- If the assembly swings in the wrong plane, its spindle has probably unseated. Ease the two support arms apart just enough for the spindle end to drop back in.
- On a brand-new station, check that you have removed the plastic transit tie.
Watch the official Davis video

Parts you may need
Try the free checks first. It is worth ordering a part only once the manual tip test has shown which bit has failed.

Rainfall looks suspiciously low after heavy rainFree fix - cleaning only
What is happening
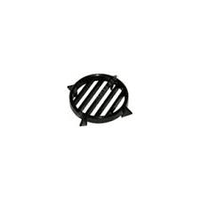
A precise but very small figure after a downpour, while every other sensor behaves perfectly, is usually a partial blockage rather than an electronic fault. Water is getting into the funnel but not reaching the mechanism.
The usual culprits are leaves and leaf fragments, blossom, seeds, moss, pollen, dust, spider webs, dead insects, insect nests and bird debris.
The two-minute test
- Lift off the cone and look down the central hole against the light.
- Clear any debris, then rinse the cone and mechanism gently.
- Check the mechanism swings freely, reassemble it and run the manual tip test.
- In most cases no parts are needed at all.
Parts you may need
Usually no parts at all. The cone kit is only needed if your cone is cracked or badly crazed.
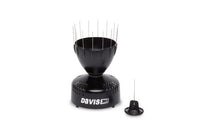
Rainfall over-reads or jumps up after rainSoldering required
What is happening
Totals that read high, or jump up after the rain has stopped, usually have one of two causes, and both are straightforward to test.
Moisture in the rain socket on the transmitter board can make it register phantom tips.
The other possibility is a reed switch that bounces instead of closing cleanly, so a single tip gets counted several times.
The two-minute test
- Dry out the rain socket first, in the same way as for wind speed spikes.
- Then tip the mechanism slowly by hand a known number of times and compare that with the displayed total, allowing several seconds for it to settle.
- If the console shows more rain than the number of tips you made, a bouncing reed switch is the likely cause.
Watch the official Davis video
Parts you may need
Rainfall consistently out by about 20 to 25%Easy - no tools
What is happening
An error of this size is usually not a fault at all. More often it is a units mismatch between the gauge and the console setting.
A metric gauge tips at 0.2 mm and a US gauge at 0.01 inch, which is 0.254 mm, and the console needs to be set to match the hardware you actually have.
The give-away is a total that goes up sometimes by 0.2 mm and sometimes by 0.3 mm, which is simply rounding on an inch gauge.
For reference, Davis quotes roughly 4.3 ml of water to tip a metric mechanism and 5.4 ml for the US version.
The two-minute test
- Find the small round calibration label on the cone, or on the base inside the cone, and note the increment.
- Set the console to match. In most cases the error then disappears.
- If you want to check the calibration properly, drip 544 ml of water slowly through the funnel over 30 to 60 minutes. A correct gauge will show 25.4 mm.
- Only if that fails is it worth touching the adjustment stops under each end of the mechanism. Move both equally and in small steps, because the factory setting is very hard to recover.
Parts you may need
No parts needed, as this is normally just a console setting.
Temperature & humidity
Temperature or humidity shows dashes, or reads wronglyTools needed
What is happening
Dashes or odd symbols on the console are usually caused by a problem with the console receiving data from the station. If no data arrives for around ten minutes, the console replaces the readings with dashes, so if every sensor shows dashes at once, the radio link is the most likely culprit rather than the sensors themselves.
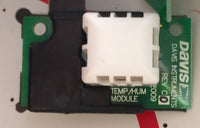
If it is only temperature and humidity showing dashes or nonsense, that points more towards the sensor board itself.
A dirty or blocked radiation shield can also make temperature read high in sunshine, without there being any sensor fault at all.
The two-minute test
- Compare the outside temperature with a decent thermometer in full shade.
- Check that the radiation shield plates are clean and the mesh is not clogged.
- Bear in mind that readings above about 95% humidity are inherently less accurate, and many stations will not display higher than 98 or 99%.
- Temperature and humidity can both be calibrated in the console, which is well worth trying before you replace anything.
Watch the official Davis video

Parts you may need
Check before you order: Fits any VP2 made from January 2006. On stations older than the AS revision, enter a -0.5C temperature offset in the console after fitting
Reception
Console shows dashes on everything, or sits on receiving from station 1Easy - no tools
What is happening
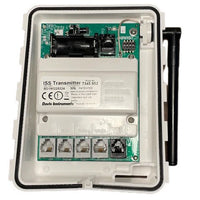
When every reading fails at the same time, it is usually a radio or power problem at the transmitter rather than anything wrong with the sensors.
The reception indicator in the bottom right of the console is a good guide. X flashes each time a packet is received. R means the console is trying to re-establish a lost link, and it will keep trying for 10 minutes before it dashes out the readings. L means the link is lost and the console has gone to sleep for 15 minutes. Entering and leaving Setup Mode will wake a sleeping console.
If the console sits on "receiving from" at start-up, that is quite normal while it scans for stations.
The two-minute test
It is usually quickest to work through these in order.
- Transmitter battery. A fresh CR-123A 3-volt lithium should last at least six months with no solar input, and typically 18 to 24 months with a well-exposed panel. A low battery warning on station 1 means it is time to replace it.
- Channel. There are eight channels and the factory default is 1. The console and transmitter have to match, each transmitter on site needs its own channel, and any unused console channels are best set to OFF.
- Interference. Another Davis transmitter within a few hundred metres on the same channel can interfere, and channel 1 is the one everyone shares. Moving both ends to another channel is a quick test.
- Range and path. Expect 250 to 300 m line of sight. Thick walls, sheet metal and reinforced concrete cut that down badly, while a window in the path helps a lot. Getting both units clear of ground level makes a difference, and upstairs is worth trying in marginal cases.
- Antennas. Keep the console and ISS antennas parallel, so both vertical normally, or both horizontal if the ISS sits above the console.
- Region. North American and Rest-of-World units transmit on different frequencies, so they will not pair with each other. A cabled console will not work with a wireless sensor suite either.
- The console has a diagnostic mode that gives an objective numeric reception figure, which is useful if you want to confirm what is happening.
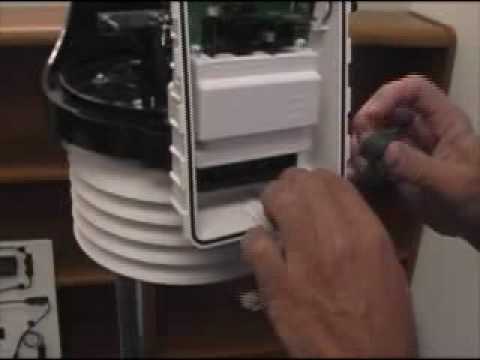
Watch the official Davis video
Parts you may need
Power & battery
Battery flat within weeks, or data lost only overnightSoldering required
What is happening
The transmitter runs off the solar panel during the day and stores surplus power in a supercapacitor to carry it through the night, only falling back on the lithium battery after that.
Sometimes, usually after a number of years, the supercapacitor can develop an internal leakage path, which quietly drains the battery.
Three symptoms tend to go together when this happens. Battery life of days to a few months rather than well over a year, reception that fails overnight and comes back in daylight, and repeat low-battery warnings even with a new battery fitted.
The two-minute test
- Fit a fresh battery first, as that rules out the simplest explanation.
- Check that the solar panel plug is connected, which is easy to leave off after the cover has been removed, and have a look at the panel's own connections.
- If it still drains, try disconnecting the solar panel for a couple of days. Very occasionally the panel itself develops a leakage path.
- Remove the inner cover, which is held by four screws, and inspect the long cylindrical capacitor. The leads should look clean, bright and untarnished.
- Gunky or crystalline residue seeping from the body onto a lead is a good confirmation.
- If you do fit a new one, support the lead with pliers and avoid bending it where it meets the body.
Parts you may need
Check before you order: Most often seen on stations from the mid-2000s, but not impossible on any age of station
Housing & shield
Daytime temperatures read too high on a fan-aspirated stationTools needed
What is happening
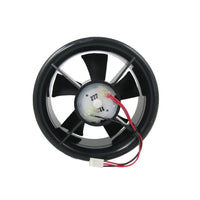
On a fan-aspirated station, daytime temperatures that read too high are often a sign that the fan has stopped. The shield relies on forced airflow over the sensor, so if the motor has failed it behaves like a passive shield, and those tend to over-read in strong sun.
The two-minute test
- Stand under the shield in daylight and listen. You should be able to hear the fan running.
- If it is silent, the motor has most likely failed.
Parts you may need
Servicing
Nothing is broken, but the station is five years oldTools needed
What is happening
An annual clean, plus a fuller service every few years, goes a long way towards keeping a VP2 accurate. A lot of what looks like sensor drift turns out to be dirt, and a station that seems dead in February is often just a battery that should have been changed in October.
The two-minute test
This is Davis's own routine.
- Clean the UV and solar radiation diffusers with a soft cloth and water, or denatured alcohol where needed. Try not to touch them with your fingers.
- Clear the rain cone and debris screen, and clean the tipping mechanism and the collector drains.
- Take the radiation shields apart with a Phillips screwdriver, supporting them as the last screw comes out, and brush the mesh.
- Remove the wind cups with the Allen key, then clean the shaft, vane and cups.
- Disconnect the sensors from the interface before you start, so that handling them does not log false data.
While you are up there it is worth checking that the solar panel is clean and unshaded, the mounting is secure, and the station is still level, since the rain gauge depends on it. It is also a good time to replace an ageing backup battery, ideally before winter rather than after.
Through the year, spring is a good time to clear winter debris and check the moving parts. In summer, look for insects, spiders and dry vegetation. In autumn, watch for leaves and seeds, and in winter check the battery and the mounting.
Watch the official Davis video